- install debian with GUI
- set static id address with nds 8.8.8.8
- set hostname
- root# cp /etc/hostname /etc/hostname.bak
- root# vi /etc/hostname
- debian8
- set hosts
- root# cp /etc/hosts /etc/hosts.bak
- root# vi /etc/hosts
- 10.64.202.8 debian8.deb8.com debian8
- close firewall
- root# systemctl disable firewalld
- root# systemctl stop firewalld
- install bind9
- root# apt-get install -y bind9
- root# systemctl enable bind9
- root# systemctl start bind9
- after install dns server, we modify setting of DNS.
- nano /etc/bind/named.conf.options
- dnssec-validateion auto --> dnssec-validateion no
- add recursion yes; (optional)
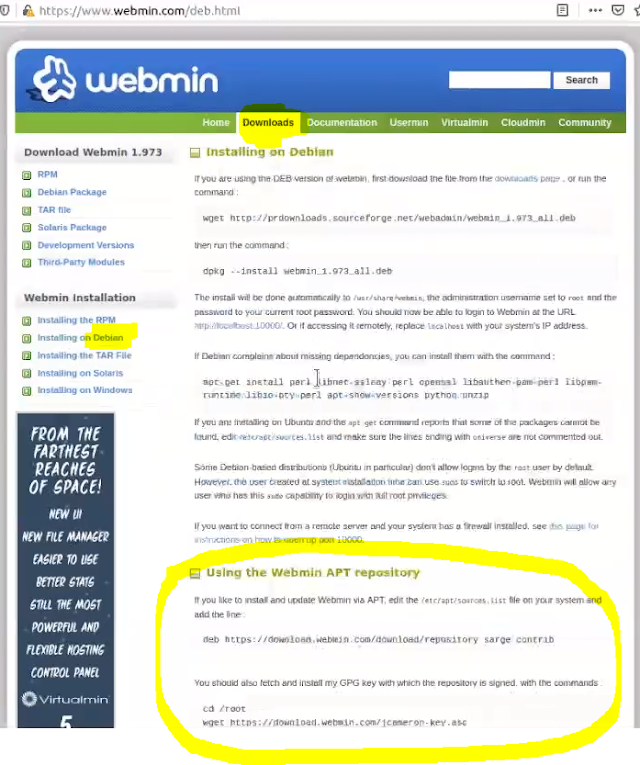
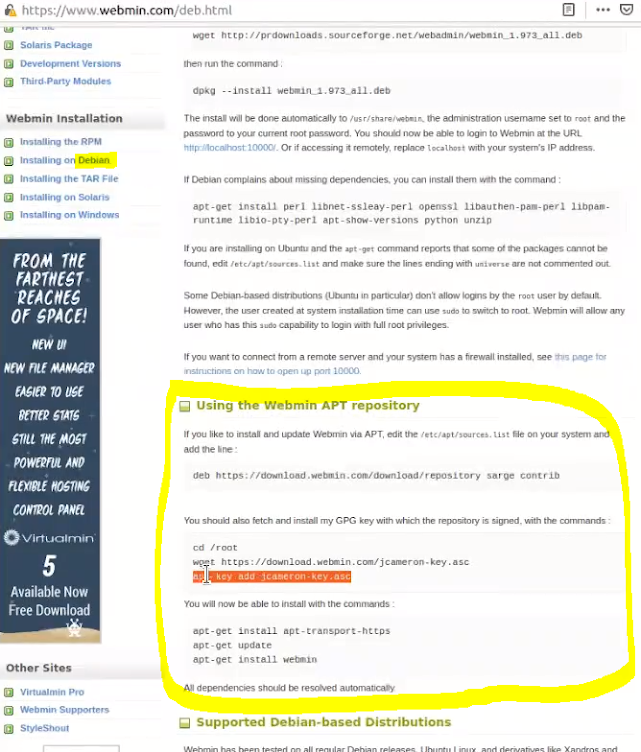
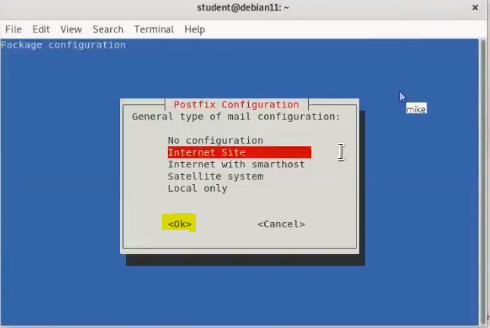
- go to webmin.com to install webmin
- open webmin by https://debian8:10000
- create master zoons(deb8.com and deb8.ca), and A records, and MX records.
- In ‘zoon option’ allow zoon transfer to class dns server.
- Create secondary zoon in class dns server to transfer dns zoons.
- After these DNS setting, we change back DNS from 8.8.8.8 to local 10.64.202.8
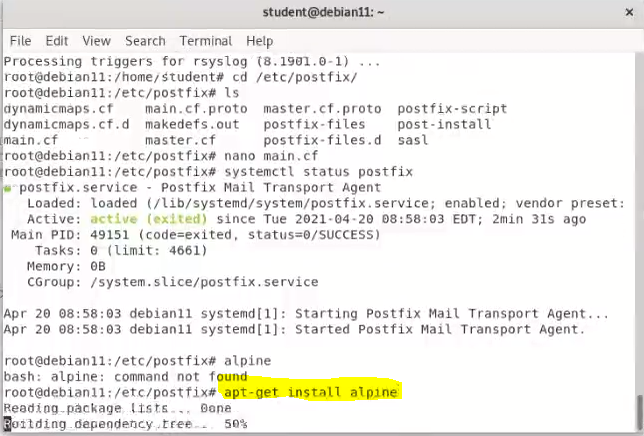
- This time we remove sendmail and install postfix for Debian.
- Apt-get install postfix.
- After installed postfix, we need to modify main.cf

- Make sure the settings for myhostname:

- Mydestination add deb8.com, deb8.ca
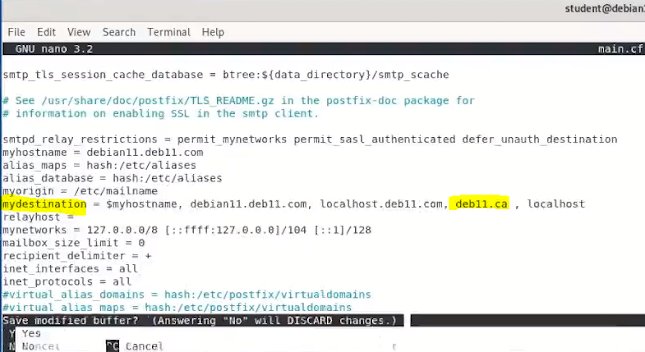
- mynetworks add 10.64.0.0/12
- Install alpine
- Install dovecot
- apt-get install -y dovecot-core dovecot-pop3d dovecot-imapd dovecot-lmtpd
Or for fedora and centos:
- Check the configure file:
vi /etc/dovecot/dovecot.conf
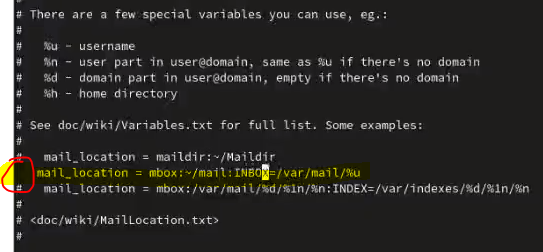
- vi /etc/dovecot/conf.d/10-mail.conf
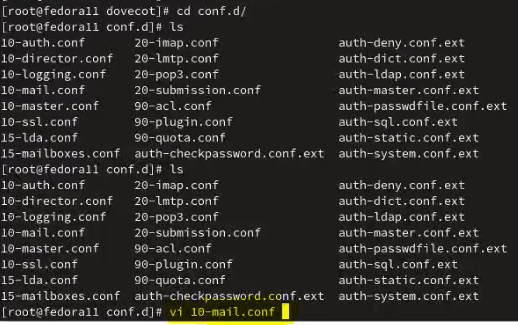
- remove the # to indicate the mail location.
- SOLUTION FOR ERROR WITH OUTLOOK CONNECTING TO POP3 (Not yet test)
- cd /etc/dovecot/conf.d
- vi 10-auth.conf
- disable_plaintext_auth = no
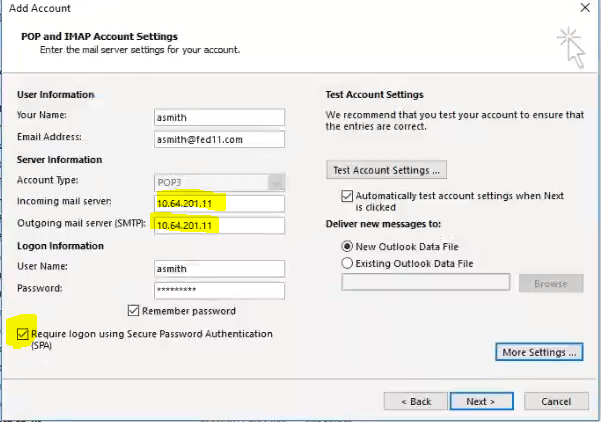
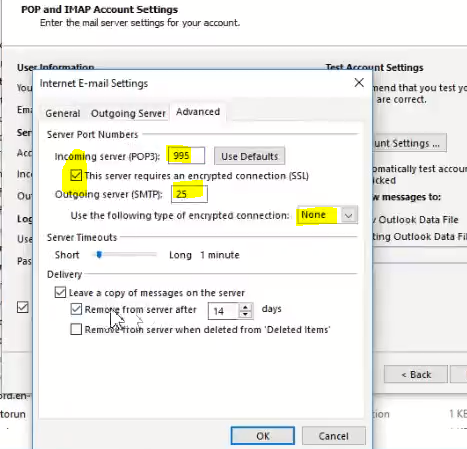
- save the file, restart the service, in outlook turn of secure authentication SPA
- And under the advanced tab uncheck the pop3 ssl authentication
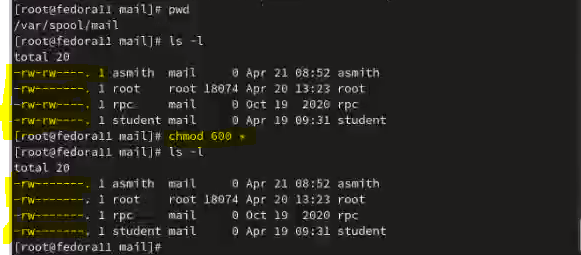
- change the mail folder permission to 600.
Now we can setup the client email using outlook
- add new pop and imap account in outlook